Free Pickup Point Delivery from €50
Find out what's new here
 

PPMC pour vous servir !

02 97 59 14 23

DIY Sewing Tutorial: How to Sew a Fabric Bunting Garland

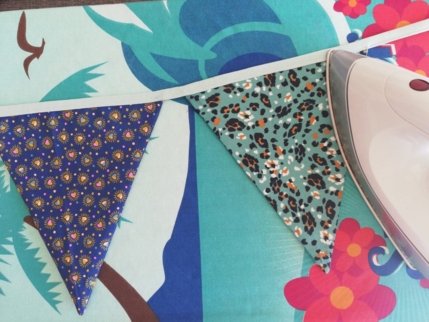
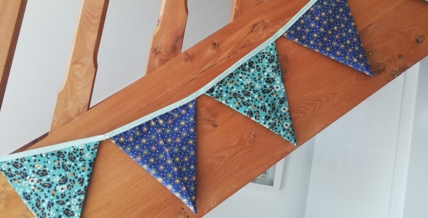
Bring color into your home with this cheerful and beginner-friendly sewing tutorial for a bunting garland. Whether it’s for a birthday, decorating your child’s room, or adding a splash of color to your terrace in summer this bunting adapts to every occasion.

This colorful DIY is suitable for beginners and advanced sewists alike, and it's also a great opportunity to teach children the basics of sewing through a fun and creative project.

Supplies You'll Need

To make your pretty fabric bunting garland, gather:

  • Bias tape (if you don’t have any, check out Dodynette’s tips to make your own)
  • PPMC cotton fabric of your choice
  • Sewing pins
  • Fabric scissors
  • A sewing machine
  • An iron
  • The flag template, available for download here

Step-by-Step Tutorial

Step 1: Print the Template

Download and print the triangle flag template (if you haven’t already), then cut it out.

Step 2: Cut the Fabric

Trace the triangle template onto your fabric using a fabric pencil or chalk.
You need 2 triangles per flag. For example, if you want 5 flags, cut out 10 triangles.

Step 3: Pin the Triangles

Place two triangles right sides together and pin along the edges.

Step 4: Sew the Flags

Sew along the two long edges of the triangle. Do not sew the base.

Pro tip: Remember to make a few back-and-forth stitches at the beginning and end of your seam to secure it.

Step 5: Turn Right Side Out

Turn the flag right side out through the base opening.

Step 6: Press the Seams

Iron each flag flat:

  • First, press the seams from the inside

  • Then, press again from the outside to smooth everything out

Step 7: Repeat for All Flags

Repeat steps 3 to 6 for every flag you want to include in your garland.

Step 8: Position the Flags on the Bias Tape

Place the first flag 20 cm from the beginning of the bias tape.
Then, space the other flags evenly, leaving 2 cm between each.

Step 9: Fold and Pin the Bias Tape

Fold the bias tape in half over the top of the flags and pin as you go to hold everything in place.

Step 10: Secure the Ends

Start by sewing the ends of the bias tape closed. Fold the tape in half and sew back and forth a few times to secure it.

Step 11: Sew the Bunting

Sew along the entire length of the bias tape, about 2 mm from the edge, to attach both the flags and the tape together in one go.

Step 12: Finish the Other End

Once you reach the end of the garland, finish the bias tape like you did at the beginning (see step 10).

Step 13: Final Press

Give your entire bunting a final press with the iron to flatten everything nicely.

Your Fabric Bunting Garland is Ready!

That’s it you’ve completed your colorful fabric garland!
Is it already hanging on the wall? Let us know how it turned out in the comments, and don’t forget to share your creation on Instagram or Facebook with #papapiqueetmamancoud.

Want more fun sewing projects?

You can also try our tutorials for cloth napkins or fabric fish plushies also available on the blog. Why not match your garland to your cushions or table decor?

Happy sewing from the team at Papa Pique et Maman Coud!