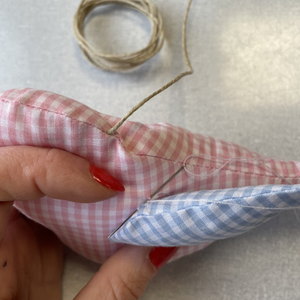
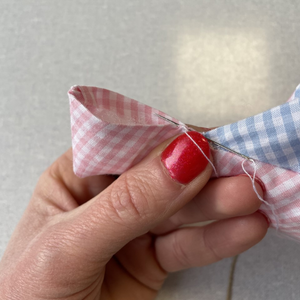
DIY Tutorial: How to Make a Bird Mobile
Papa Pique et Maman Coud has the perfect easy sewing tutorial to help you make a beautiful bird mobile with three fabric birds.
PPMC at your service!
02 97 59 14 23Two fabric scraps of 30 x 30 cm in matching colors
Stuffing (kapok, fiberfill, etc.)
Thick thread (embroidery floss, string, yarn…)
A sewing needle and thread
Note: This material list is for making one bird. This DIY project includes 8 simple steps—don’t worry, it’s very easy!
Set your sewing machine to a short stitch length (2mm). Sew the two wing pieces right sides together, leaving an opening as marked on the pattern. Repeat for the second wing.
Trim the seam allowance at the pointed tip of the wing and reduce all seams to 0.5 cm, except at the opening. Turn the fabric right side out, stuff lightly and evenly, then close the opening with a few hand stitches.
Pin the belly piece to one side of the bird, right sides together, starting from the mark and sewing all along to the base of the tail. Stitch.
Tie a large knot at the end of your hanging thread or cord.
Hang your bird and watch it dance in the air!
Congratulations, you’ve just made your very own handmade bird mobile!
This tutorial shows how to make one bird—repeat the steps for each bird you want. We recommend making three birds, as shown in the photos.
You can hang your mobile above a baby’s crib or in any cozy corner of the house.
This easy beginner sewing tutorial is complete!
If you enjoyed it, leave us a comment and share your creations on Instagram with @papapiqueetmamancoud and the hashtag #ppmccouture.
Have more DIY home decor ideas? Share them with us on Instagram—we’d love to create more beginner-friendly sewing projects based on your suggestions.
Discover more of our zero-waste everyday sewing tutorials on our blog!
Are you sure you want to perform this action?