


Sewing Tutorial – How to Make a Drawstring Pouch
Want to make your own drawstring pouch? Here’s a beginner-friendly tutorial. Just gather the supplies below and follow each step.
Needle and thread at the ready!
Difficulty Level: 1.5/5
Free delivery and returns in store
Pay in 3 interest-free installments with Alma
PPMC pour vous servir !
02 97 59 14 23Want to make your own drawstring pouch? Here’s a beginner-friendly tutorial. Just gather the supplies below and follow each step.
Needle and thread at the ready!
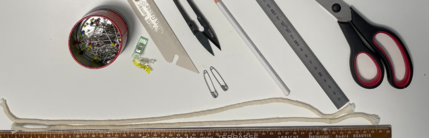
Cotton fabric
A ruler – fabric (in the video, a rectangle of bronze navy bubble fabric)
Matching thread
A pair of scissors
A thread cutter
A white fabric pencil for marking
Two drawstrings
A sewing machine
Two safety pins
Fabric clips and pins
Step 1:
Using the white pencil, make markings 5 cm from the edge on each side of the fabric.
Step 2:
Fold the fabric right sides together, with the pattern on the inside (as shown in the video below).
Step 3:
Sew each side, starting and stopping with a backstitch at the markings. Do the same on the other side.
Step 4:
Trim and clean up the threads.
Step 5:
Sew the other side in the same way.
Step 6:
Use the ruler to fold over the top edge – this fold will be the channel for your drawstring.
Sew 0.5 cm from the edge of the fold and hold the crease with a clip. Then, with the ruler, fold the fabric 1 cm all along, then fold again at 2 cm. Check that the edges align properly.
Step 7:
Repeat the same process on the other side.
Step 8:
Sew along the folded areas on both sides to create the channels.
Step 9:
Insert the drawstrings using a safety pin to guide them through the channels.
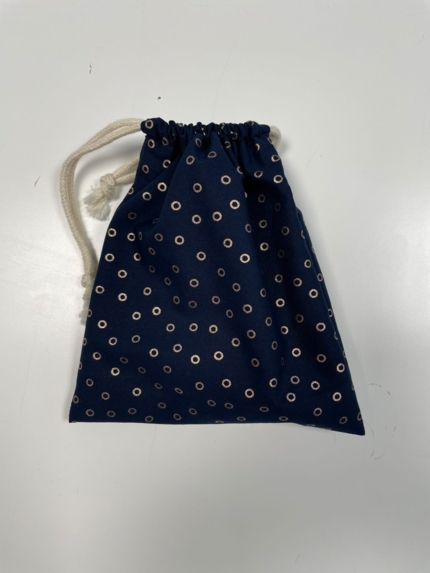
And there you go!
You’ve just made a beautiful drawstring pouch, sewn with our bronze bubble cotton fabric available on papapiqueetmamancoud.fr. Perfect for storing scrunchies, hair clips, jewelry – or whatever you like!
🧵 Explore our wide selection of cotton and coated fabrics for all your sewing projects and creative ideas:
👉 Tissus PAPA PIQUE ET MAMAN COUD
Êtes-vous sûr de vouloir effectuer cette action ?